
Skip to Section
Without a doubt, one of the single most important factors in successfully recording a time lapse shoot is the power source.
If you don’t have a good reliable source of power for the entirety of the photo shoot, your time lapse video will fail.
If you are reasonably experienced using a canon DSLR camera, you will know that you can only expect to get a few hundred time lapse images out of a fully charged, new battery before you run out of juice.
Canon DSLR battery life
The battery life of a DSLR varies depending on the make and model, but in general you should expect something around that number.
If your battery has been through a few discharge/charge cycles, the number of how many shots you can expect out of a full charge will reduce significantly.
Whilst power may be an easily solved problem for your average time lapse photography shoot, for longer term projects like construction time-lapse, a reliable long-term power source is essential.
So what can be done?
You can save battery life by making sure that you use the lowest power settings on your camera, such as using manual focus or turning off image stabilization in the camera settings.
You can also install an AC adapter, or buy one specifically designed for time lapse photography if your model of DSLR doesn’t have one already.
The advantage of this is that it will provide a constant source of power to keep your time lapse photography running, and it won’t overheat or suffer from battery drain.
Can you swap out the battery when it gets low?
Don’t be silly. Removing your camera from the tripod or slider to change the battery would disturb it’s angle and/or position, causing a jump in the final video.
When your camera is shooting time lapse video, it’s not a good idea to disturb it for any reason.
Therefore we need a way to supply constant power to the camera for the full duration of the time lapse video shoot.
Do DSLRs have an external power supply input?
Most DSLR cameras don’t have an external power input. This is quite frustrating for time lapse photography as external power is necessary when filming for extended sessions.
The solution
The most commonly used solution is a dummy battery with a USB power bank.
The dummy battery allows you to feed external power into your camera from an external power source (a USB power bank in this case).
This allows you to effectively increase the capacity of the battery as you are not restricted to what can fit into your camera.
Dummy DSLR Battery
Dummy batteries (Or DC Couplers as they are also known) are the same size and shape as your camera’s original battery, and they fit into your camera just like the original.
The difference being that a dummy battery is not a battery at all, it is a connector with a cable to which an external power supply can be connected.

You can pick up a dummy battery from eBay for around $10. Just be sure to order the correct one – different cameras have different battery types.
Making your own dummy battery
If you’re determined to save some pennies, or maybe you just have an old dead camera battery going spare and you want a weekend project, then making your own dummy battery is pretty easy.
There are a couple of instructional guides online which explain the process. This video does a pretty good job of explaining:
The power source
So you have a way of getting power into your camera from an external source. Great, but what power source options are there?
Depending on your specific needs, there are a few options available to you.
Wall plug power supply (Wall-wart)
If your time lapse video shoot is within a sensible distance from a main supply, or if you can realistically run an extension lead out to it, then a a wall plug power supply (PSU) might be your best option. Just make sure the voltage matches your camera’s
The most commonly used power source is a wall plug power supply. This is great for indoor time-lapse shoots, however for outdoor filming, a portable power supply is necessary.
USB power banks
If you’re shooting outdoors, then a mains powered solution probably isn’t for you. In this case, you’ll probably need a USB power bank.
Auto-off feature
Not just any USB power bank will do though – if you try to use the one you have sitting around the house, it may turn off after a couple of minutes as most USB power banks have a feature to turn themselves off if the device connected to them is not drawing sufficient current.
When testing my power bank with a Canon DSLR however, I found that it seems to draw enough current to keep the power bank happy, so it didn’t power off at all.
It might be a good idea to turn up your camera’s screen brightness and make sure it’s set to auto-preview when taking each picture, this may also improve image quality. This should cause it to draw more current from the power bank, hopefully enough to keep it from switching off.
If your power bank still turns itself off after a few minutes, fortunately there are options.
Although they are quite hard to find, there are some USB power banks that have an always-on output especially for such purposes as time lapse photography.
Always-on USB power banks
 It is surprisingly hard to find a power bank that doesn’t have the auto-power-off feature. Some very cheap power banks don’t have the feature, but we wouldn’t recommend them as cheap power banks are notoriously unreliable.
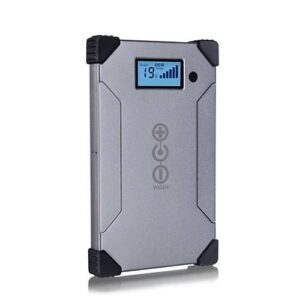
One popular trusted brand that features an always-on power mode is the Voltaic V25 – V88 range.
The Voltaic V88 Powerbank, in particular, boasts a whopping 24,000 mAh capacity. It features both USB-A and USB-C output ports with USB-C input for charging the power bank itself.
When charging, the power bank continues to serve power to the camera which is a great feature.
Another great thing about this battery is the availability of a separate solar panel, which enables you to charge the power bank for long periods of time.
This would be ideal for multi-day time lapse video shoots, e.g on a construction site.
Disabling a USB power bank’s auto-power-off feature
If you already own a USB power bank, but it has an auto-power-off feature, then you can still use it.
The trick is to draw enough current from the power bank so that it stays on, using a dummy load.
Using a dummy load
A dummy load is basically just a resistor connected across the power terminals of a USB plug, which draws sufficient power from the power bank to trick it into thinking something is connected and charging.
A dummy load can help increase the output current of your USB power bank, preventing the auto-power-off feature from activating so you have more time to create time lapse videos
You can make a dummy load yourself using an old USB cable and a resistor. Just be careful to select the correct value resistor though, so that the dummy load doesn’t draw too much current.
Most guides you will find online to making your own dummy load use resistor values that are too low, as they are intended to draw a lot of current for testing batteries.
You only want to draw say 100mA to keep the power bank happy, so let’s use Ohms law to work out the correct resistor.
The ohms law equation for calculating resistance is as follows:
Resistance = Voltage/Current
The voltage of a USB port is 5v and we want to draw around 100 milliamps (mA) which is the same as 0.1 Amps.
Therefore the equation becomes:
5 / 0.1 = 50 Ohms
So to draw 100mA from the power bank, we are looking for a 50 Ohm resistor. Resistors tend to come in standard values, so anything around the 50 – 80 Ohm range should be fine.
Going slightly lower than 50 Ohms (say to 44 Ohms) should be fine, although don’t go too low as lower resistance means more current will be drawn which in turn will run your power bank’s battery down faster.
Modifying a power bank
If you are more electronically-minded, then you may be able to open up the power bank and disable the auto-off feature.
Information is available online to help with this. I would not recommend this route for most people though – Luthium batteries are highly volatile and carry a high risk of fire or explosion if tampered with.
Making a custom battery pack
If your needs are beyond what a USB power bank can achieve, perhaps you need to record time lapse for months at a time, and you understand basic electronics, then a custom battery solution is probably right for you.
By choosing to make your own power supply to shoot time lapse images, you have the freedom to choose from a range of battery technologies and capacities.
We’ve covered a couple of available options here, but battery technologies are worth more research if you’re serious as there are lot of options out there and technology is always moving forwards.
Battery technologies
When building any battery solution, the choice of battery technology is important.
Choose the wrong one and your battery might give up on you prematurely. You might also find that you spend double what you probably could have, because the battery technology you chose is over-engineered for your needs and you could have achieved your goal with a much cheaper battery.
An example of this could be Sealed lead-acid vs Lithium-Ion.
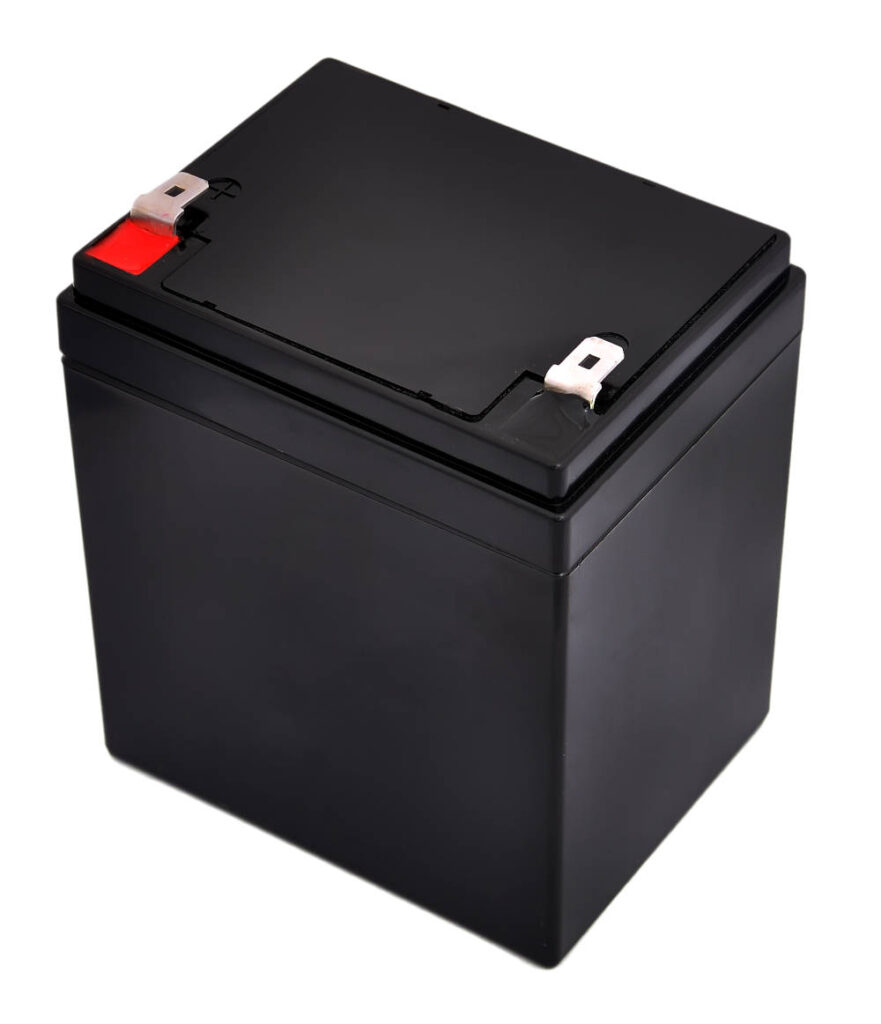
Sealed lead-acid
Commonly found in alarm systems, UPS systems and motorised scooters/golf buggies. Sealed lead-acid batteries have been around for many years. They continue to remain popular as their benefits make them the preferred choice for their typical applications
Benefits
- Rechargeable
- Low cost
- High reliability
- Low self-discharge rate
Limitations
- Bulky and heavy
- Slow to charge
If you’re looking to shoot a longer intervals of time-lapse, perhaps over a number of days, weeks or even months, then sealed lead-acid is likely a good choice.
Sealed lead-acid batteries are available with really high capacities at a reasonable price, so they are a popular choice for long term time-lapse recording projects.
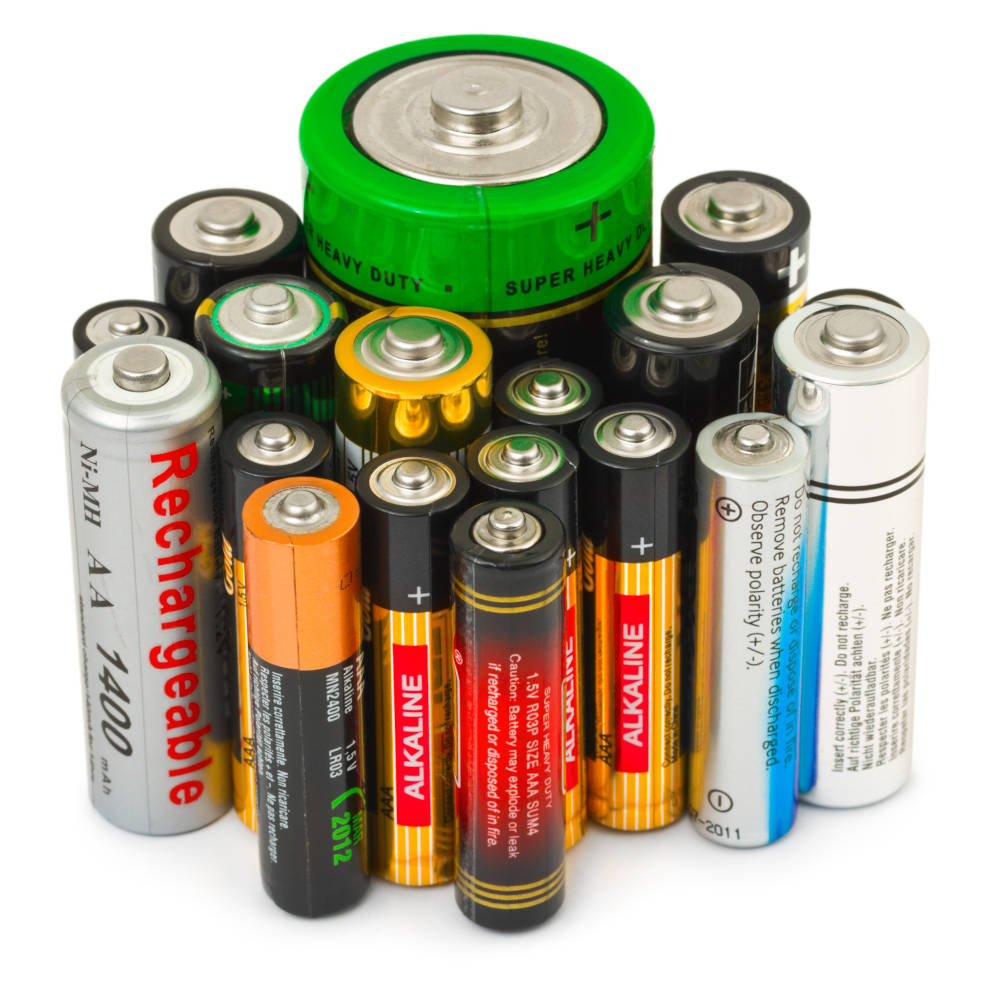
Alkaline
One of the most popular battery technologies for general use due to it’s broad range of benefits, you will commonly find Alkaline batteries in supermarket aisles in standard sized (AA, AAA, C, D).
Benefits
- Long life
- Low temperature operation
- Standard sizing
- Inexpensive
- Convenient
Limitations
- Can leak long term
- Quite bulky
If you would prefer the convenience of being able to replace batteries rather than recharge them, then Alkaline batteries could be the solution for you.
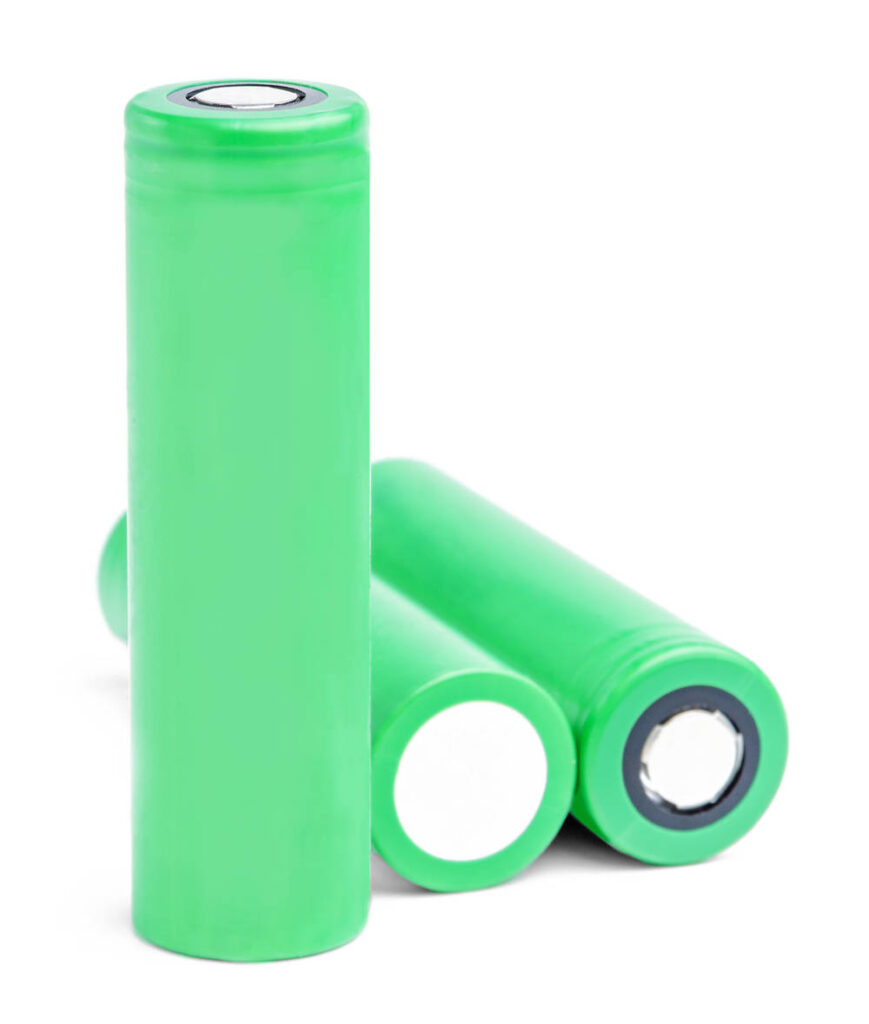
Lithium-Ion
Whilst comparatively more expensive than the other options presented above, Lithium-Ion battery technology has a number of advantages over the other technologies.
Benefits
- Fast charging
- High energy density
- Long life
Limitations
- Expensive
- Needs a protection circuit
In order to charge Li-Ion batteries, you will need a special charger or BMS (Battery Management System). These can be sourced from your favourite electronics supplier.
Getting the voltage right
Now that we have an idea of what battery technology we’d like to use, we need to make sure that the voltage output from the battery matches what our camera needs.
Always take care to match the battery voltage to the camera. Connecting a 12v battery directly to a DSLR camera could permanently damage the camera and ruin your day.
Using a boost converter to increase voltage
Let’s say we decided to use a lithium battery pack to power our DSLR camera. Our camera requires 7.4v but the battery pack only supplies 3.7v. We need a way of ‘boosting up’ the voltage to meet our camera’s needs. A boost converter increases the voltage of a power supply (at the expense of a reduced current).
In the not-so-distant past, adding such luxuries as a step-up boost converter to your circuit meant spending upwards of $30 with an electronics supplier potentially even assembling a kit the size of a packet of cigarettes.
These days, thanks to the ever-advancing electronics market, these circuits are available on eBay for just a few dollars.
I’d recommend sourcing from a dedicated electronics supplier who should have the necessary expertise to recommend the right product for your needs.
Using a buck converter to reduce voltage
Just like you can use a boost converter to increase voltage, you can reduce a voltage by using a buck converter. You might want to use a buck converter if you’re using a 12V sealed lead-acid battery.
Again, these are available from any good battery supplier. Radio-Controlled electronics stores tend to have a good range of these products.
Putting it all together
Now that we have a battery and a means of converting the voltage to the required range, we need to connect everything together.
Make sure your battery is fully charges and connected up to your boost or buck converter. Test the output voltage that will be fed to the camera to make sure it is as expected (Canon DSLR cameras are around 7.4V).
Once you are happy that everything works, I would recommend investing in the following:
Soldering iron/Solder
Used to make all connections secure and permanent
Heat shrink tubing
Used to insulate any exposed solder joints and connections.
Insulation tape
Same as above
18 Gauge wire
Used to wire up boost/buck converter with battery
2.1mm x 5.5mm Barrel jack plug
If your dummy battery has a barrel socket, then adding a barrel plug allows quick connection/disconnection. Or you can just cut and join wires directly.
Waterproof enclosure
This is important if your setup is going to be left unattended. There are a variety of different shapes, sizes and materials available.
Best camera settings to shoot time lapse photography
Now that you have your DSLR powered up and ready to go, time lapse photography requires a few specific settings on the camera.
Firstly, you’ll need to set the Exposure Mode to Manual mode (M).
This will allow you to adjust the Shutter Speed/Exposure Time and Aperture accordingly. Use an Exposure Time of around 1 second and adjust the aperture to get your desired depth of field.
You will also need to manually set the White Balance and ISO settings depending on the type of light you’ll be shooting in.
For longer time lapse photography, it might be a good idea to turn off Image Stabilisation so that any camera movement isn’t amplified. Finally, make sure you have plenty of storage available for your time lapse images.
The settings you use may differ depending on the type of time lapse video you are creating for example a night sky or a sunrise/sunset, or even everyday life so make sure you adjust your settings accordingly.
In Summary
Hopefully this article has given you some idea of what’s possible when powering your time-lapse photography setup.
We’ve barely scratched the surface in each of the areas covered, but this should at least give you an idea of what you need so that you can research further.
If there’s anything I’ve missed, feel free to drop a comment and I will expand the article as necessary.
Pingback: 7 essential items for time-lapse shooting - Pro-Lapse
Pingback: The Ultimate Construction Time Lapse Camera Guide - Pro-Lapse