
Skip to Section
This guide covers a handful of essential items for time-lapse, if you’re just getting started, use this as a checklist of things you’ll need.
Read on to find out what gear you will need to add to your birthday wishlist this year!
What equipment do I need to film a time-lapse video?
Whilst the exact equipment you need will vary depending on the specific project you are working on, there are some general pieces of kit that are essential.
A DSLR Camera Body
The very first thing you will need to shoot a time-lapse is a camera body. Whilst these days you can achieve a surprisingly high quality using smartphones, if you are looking to shoot time-lapse at the top level, a smartphone just isn’t going to cut it. You’re going to want a DSLR, ideally with a full-frame.
For more information on choosing the right camera body, check our our dedicated guide.
If a DSLR camera is out of your budget range, there is nothing wrong with using your smartphone if it’s fairly modern. You can also download dedicated time-lapse camera apps that include an intervalometer. A really convenient way to get into time-lapse on a tight budget!
A Camera Lens
For more time-lapse shooting, the kit lens that came with your camera body is probably more than adequate for most projects.
When you yearn for something more, a wide-angle lens is usually a good purchase. Something with an aperture around 14 to 22mm. If you want to shoot in low light, particularly night-sky shooting, then something with a large aperture from f/1.2 to f/2.4 will really let in the light.
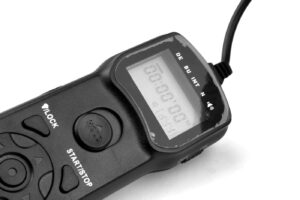
An Intervalometer
In order to trigger the camera shutter at a regular interval, you will need an intervalometer, also known as a controller.
This is another piece of kit that beginners often go cheap on. After all, it just triggers the shutter, right? WRONG!
Many photographers have made the mistake of thinking that since an intervalometer just triggers the camera to take pictures at specified intervals, then it’s not important and a cheap unit will suit the purpose. Well, I can speak from experience when I say that when you are up a mountain in the middle of nowhere at 2am setting up for a time-lapse of the night sky, after waiting two months for a new moon with a clear sky, then you want to make absolutely sure that your intervalometer does not let you down! Buy a trusted brand that is relied upon by professional photographers, not some cheap no-brand knock-off. It’s simply not worth the initial cost saving.
 A Tripod
The next essential item you will need is a tripod or some other form of stable mounting equipment such as a hi-hat for lower angles, or a fixed enclosure for longer-term time-lapse.
It is important that you get a well-built, solid tripod (or other supporting device) with solid locking mechanisms as you don’t want the camera to sag during the shoot. Lighter, cheaper tripods also tend to shake in wind, even if apparently stable and on a solid, even surface. This is a particular problem for time lapse shoots as any movement over time will be exaggerated when the clips are sped up to final video speed in post-production.
To prevent tripod movement, in addition to a well constructed tripod, it may be wise to bring along something to weigh down the tripod itself, to prevent vibrations or movement caused by wind or other elements. Do not skimp on your tripod, you will regret it. Also, if you get a quality tripod it will serve you well after you replace your current camera body.
A Power Source
Next would be a sufficient source of power. If you are shooting for a longer period of time especially. The last thing you want is for the power to run out in the middle of your planned time-lapse shoot. Often for shorter (Up to 1hr) shoots, a battery grip will be sufficient, essentially doubling the power capacity of the camera body. Remember, use higher capacity batteries from trusted manufacturers. If you have longer periods for which you plan to shoot, or intend on taking a large number of exposures, plugging the camera into an external source may be a good idea. You can get DC power adapters and an external battery or even use a small generator – there are even solar options if you have longer shooting times which can be coordinated with a weather-sealed mount.
An SD Card
Since you will be taking lots of pictures, you will need somewhere for your camera to store them of course.
Most DSLR cameras take a standard SDHC (Secure Digital High Capacity) card. High-speed, high capacity cards are a necessity for anyone serious about time-lapse. Especially if you are capturing at a quicker rate, the speed of the media can be an issue.
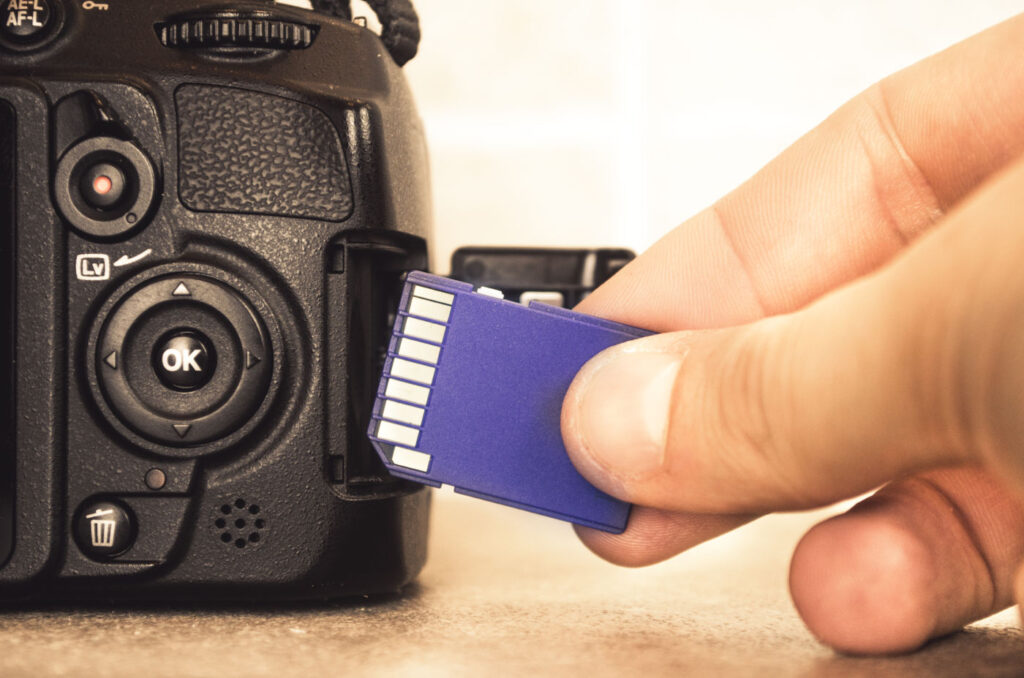
If you are taking more shots, capacity can be an issue. Cheaper cards typically only write at low speeds – around 30mbs. If you are shooting RAW (which you ought to be) at a quicker rate, this can exceed the write-speed of the media, meaning you will have issues. Tragic issues. Make sure your cards are fast enough. Also, RAW images can be quite large, but it is wise to shoot in the format. This will allow you to have a lot of control in post-production. For this reason, and the fact that time-lapse often requires a large number of captures, larger media capacities are highly suggested.
Due to the low prices of storage these days, it is worth taking at least 1 or 2 spare SD cards with you on your shoot. For the sake of a few tens of dollars, you don’t want to have to cut your trip short and ruin a time-lapse shooting session due to a failing SD card.
Neutral Density Filter
Neutral density filters. They will reduce the amount of light that will hit your sensor without altering color. This will allow you to use larger apertures and longer exposures and/or get good color in circumstances which otherwise might result in some highlight clipping. Variable neutral density filters are nice and versatile, however, beware – they can impose their own artefacts into your images. I would suggest owning a couple of solid neutral density filters of different strengths – a 3 & 6 would be a good place to start. They can be stacked atop one another, so you would have 3 possible ND strengths with these two filters. Alternatively, you could merely get a variable filter. Remember, you don’t want to cheap out, and make sure you take good care of them; any flaw in the filter will reveal itself in the image!
Weather Protection
Rain and weather protection is always a good idea to protect your camera from the elements. You never know when the weather could turn and a nice spring day can turn into a downpour.
Even in sunny weather, some sort of protective cover is often necessary as direct sun can damage your camera if the body gets too hot.
Moisture is also a serious issue. Even on weather-sealed camera bodies, rain and moisture can get on the lens, or even compromise the weather-sealing.
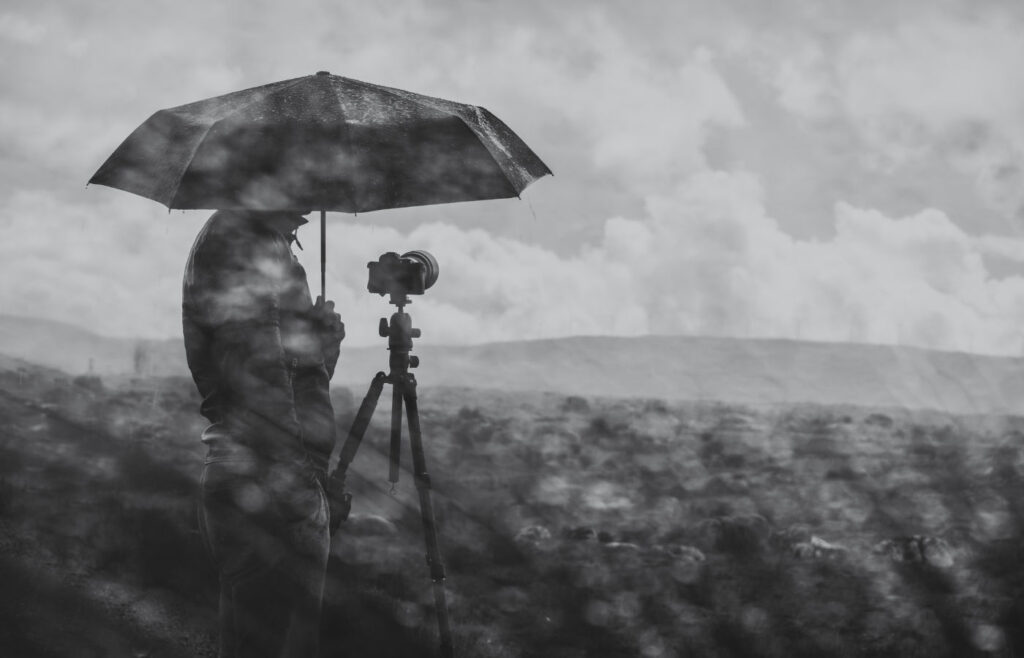
Some people even have housings built for their camera during their time-lapse shoot. It is important that, regardless of the length of your shoot, that your camera is stable and protected from the elements – the last thing you want is to turn an expensive camera into a paperweight, and ruin the shoot in the process! You also want to protect yourself – if you are uncomfortable, you will not be performing your best and may cut corners. Make sure you are well dressed and prepared for whatever the elements may bring.
Optional Items
If your budget can spare it, it would be a good idea to have another wide-angle lens on a spare camera body. This is a luxury, but one that has sure advantages. For one, with the extra resolution, you will almost certainly have in your stills, if you shoot a wider angle, even if you need to crop you will have plenty of resolution to work with. Also, if you start having issues one camera body, you can quickly switch to the second camera and keep going. If both shoots go well, you can compare the two timelapses and go with whichever is more pleasing, or you could even use the second camera for a transition to a second angle if it suits your project!
Certainly, this is not a complete list, as each shoot will have it’s own challenges, but this is definitely a good place to start. Remember to consider the environment you are shooting, how long you are likely to be shooting for, and try to think of everything that might go wrong or any challenges that could crop up. When you are dealing with nature and the outdoors, things can change quickly and being prepared for the unexpected is a good way to go.
Don’t forget your enema- I mean dust blower, for all your prolap- I mean timelapse needs!